PSP Friends Tag

Written for PSP 9, but recently tested in PSP 16/X6. Comments added for PSP 16/X6.
You will need the following for this lesson:
- Filter 'Simple' - download HERE
- Filter 'Xero - Mistifier' (xeroset 1) - download HERE
- Selection files - only if you don't want to make the selections yourself - download HERE
- Gradient 'chrisflipflop' - a gradient by MsKris at PaintShopStop - download HERE
- Text brush of your own, or the brush 'diana_internet_friend' that I used - download HERE
- Font of your choice, or the font 'GE Twine Script' that I used - download HERE
- Tube of your choice, or the 'flower and vase tube' that I used - download HERE I made the flowers in the tube based on a tut found at Suz's Place.
I also drew the vase. You are welcome to use and share this tube, but please do not change the filename.
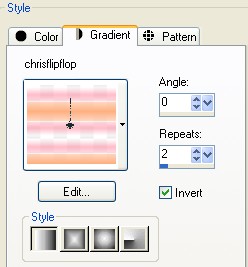
- Set the foreground color to #ffb6c5 and the background color to #ffffff. Then set the foreground material style to 'gradient' with the following settings:
- Open a new image 500 x 500, transparent background.
- Fill the layer with the background color #ffffff (white).
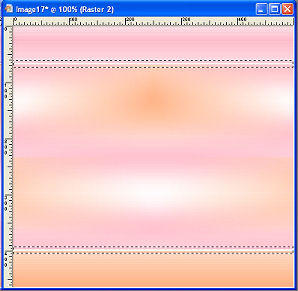
- Create a new raster layer ('Layers / New Raster Layer'). Fill the layer with the gradient (foreground material).
- Crop with the following settings:

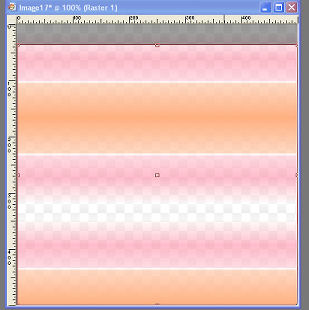
NOTE - PSP 16/X6: In PSP 16 the crop options are different. As a result, you must first click on the 'Custom Selection Tool' and enter the dimensions given in the screenshot over to the far right: Left 0, Top 36, Right 500, Bottom 500). Then, you choose the 'Crop Tool' and 'Snap to Current Selection'. - Activate the 'Selection Tool - Rectangle' and draw a rectangle as shown here. You can also load the selection as shown below:

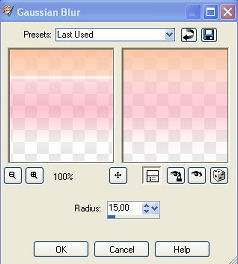
- Go to 'Adjust / Blur / Gaussian blur' and use these settings:
- Go to 'Selections / Promote Selection to Layer'.
- Then 'Effects / Plugins / Simple / Quick Tile'.
- Change 'Blend Mode' of the layer 'Promoted Selection' (top layer) to 'Luminance (legacy)'.
- If you have drawn your rectangle, save this selection either to alpha channel ('Selections / Load/Save Selections / Save to Alpha Channel') or disk ('Selections / Load/Save Selections / Save to Disk'). You can use the suggested name 'Selection 1' or type in the name you prefer. You can skip this step if you are using the selections provided.
- Select None (Ctrl + D).
- Go to the layer 'Raster 2' (the layer with the gradient on the entire layer). Go to 'Effects / Edge Effects / Enhance More'.
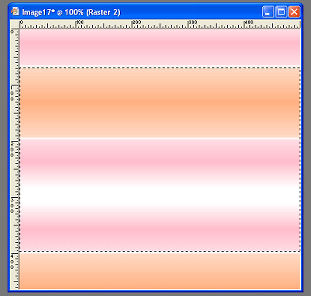
- Make sure that 'Raster 2' is active/highlighted. Draw 2 thin rectangles as shown here - don't forget to set 'Mode' to 'Add'. Or load the selection as shown below:
- Go to 'Effects / Edge Effects / Enhance'. Click ok.
- Select None (Ctrl +D).
- Open the tube. Make a copy/duplicate (Shift + D). Close the original.
- Activate/Highlight the 'Raster 1' layer. Go to 'Edit / Copy' and then go back to the main image. Make sure you are on the 'Promoted Selection' layer. Go to 'Edit / Paste As New Layer'.
- Resize - as shown here:

- Use the 'Move Tool' to position the tube as shown here:
- Go back to the tube and make a selection approximately as shown under. Then go to 'Edit / Copy'.
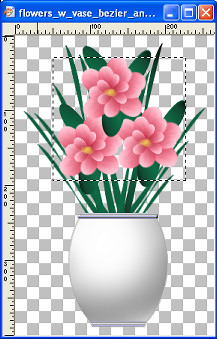
- Go back to your main image. Activate the 'Raster 3' layer (layer with the tube). Add a new raster layer.
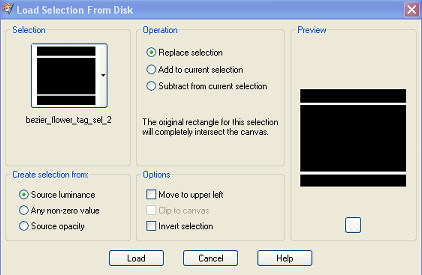
- Go to 'Selections / Load/Save Selections'. If you are using the selections provided choose 'Load from Disk' and locate the selection 'bezier_flower_tag_sel_1'. If you made your own selections, locate your selections (either 'Load from Disk' or 'Load from Alpha Channel').
- Then choose 'Edit/ Paste Into Selection'. Select None (Ctrl + D).
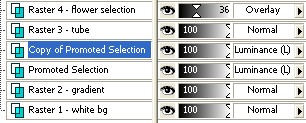
- Change the 'Blend Mode' for this new layer ('Raster 4') to 'Overlay' and reduce the 'Opacity' to '36' (or to whatever you prefer).
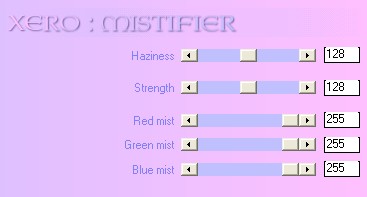
- Activate the layer with the tube ('Raster 3'). Go to 'Effects / Plugins / Xero / Misifier' and use the following settings:
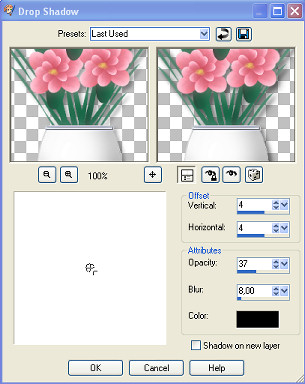
- Go to 'Effects / 3D Effects / Drop Shadow' and use the following settings ('Color = #000000 - black'):
- I wanted the green blades in the background to come out a little more, so I duplicated the 'Promoted Selection' Layer - the one set to 'Luminance (legacy)'. This duplicated layer was also set to 'Luminance (legacy)'. This is how my Layers Palette looks at this point:
- Your template is now finished. I usually keep all my layers just in case I decide to play around with it some more later. So, if you want to do it like I do, save your work as a .pspimage. Make a copy/duplicate (Shift + D).
- Close the original, then merge all layers in the copy/duplicate. Save the merged copy/duplicate as a template (.pspimage).
- Activate the template (copy/duplicate with all layers merged). Make a copy (Shift + D). Close the original template.
- Now, we are going to make a tag out of the template. I made a brush for a poem that I found on the internet. You can either use my brush, or make/use your own brush.
- Change your foreground to #808080.
- Add a new raster layer.
- Locate the brush your are going to use (my brush is called 'diana_internet_friend'). Use the following settings if you are using the brush provided:

- Add your brush - click once. Use the 'Move Tool' to get it in place.
- I changed the 'Blend Mode' to 'Multiply' and reduced the opacity to '80'.
A little side note about text: I always create my text as 'vector'. In fact, I always keep my vector text layers, too. Why? Because that way I can always know what font, size and colors I used when I suddenly a few months later decide to make a tag for someone else! Before you apply your 'Drop Shadow' (or other effects), you can either duplicate the vector layer and convert the copy to a raster layer. Or, you can create a raster selection and promote it to a layer. Sometimes I keep my vector text layer visible, sometimes I close it off.
If you want to do your text like I did, do the following: - Activate the top layer. Set the background color to #909d9b, and close the foreground color.
- Either choose your own font and settings or use the font and settings I used:

NOTE - PSP 16/X6: For some unexplainable reason, size 36 was much smaller in PSP 16. I had to use size 48. - Enter your text (I choose "To My PSP Friends"), and click apply. Move the text in place vertically (click on 'Object Selection Tool' if text is not selected and move in place).
- Center the text horizontally ('Objects / Align / Horz. Center in Canvas').
- Change the 'Blend Mode' to 'Lumuninance (legacy)'.
- Make sure the text is activated as follows:
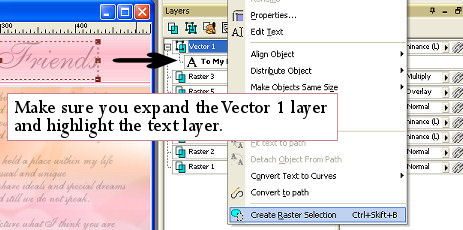
- Right-click and choose 'Create Raster Selection'. Go to 'Selections / Promote Selection to Layer'.
- Change the 'Blend Mode' for the 'Promoted Layer' to 'Luminance (legacy)'.
- Apply the same Drop Shadow as before (4 - 4 - 37 - 8).
- Select None (Ctrl + D).
- Repeat steps 38 - 46 for the text at the bottom. I used 'From Diana'.
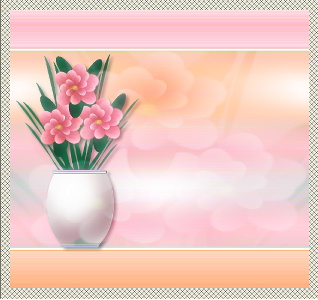
- I kept my Vector layers visible, but you can try closing them off and decide what you like best. This is how my image looks at this point:

- Save your image with all your layers (as explained earlier I like to keep my layers). Duplicate your image (Shift + D). Close the original.
- With the duplicate active, go to 'Layers / Merge All (flatten)'.
- If you want to add the borders like I did, do the following: Add a 1 pixel border - symmetric, color #f77ea5 (this is the color the dropper tool picks up if you click on the pink-colored line above the thin, white rectangle at the top).
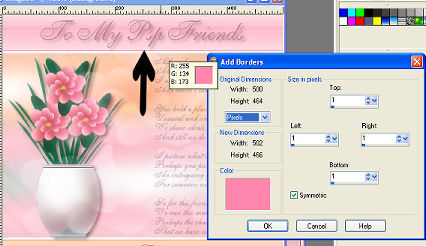
- Add a 4 pixel border - symmetric, white #ffffff.
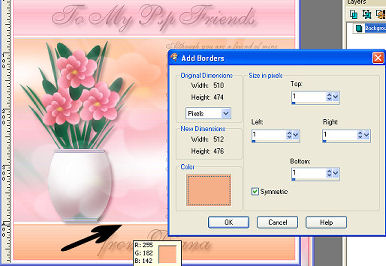
- Add a 1 pixel border - symmetric, color #f4ae88 (this is the color the dropper tool picks up if you click on the peach-colored line below the thin, white rectangle at the bottom).
- Your finished, so all that's left is to resize if you like (I didn't because I wanted everyone to be able to read the poem), add your watermark if your making the tag for someone else. Save again (as .pspimage file) and then export your image as a .jpeg. I set the 'compression value to ' 1'.
Diana Roald © 2005
NOTE - PSP 16/X6: When testing this tutorial in PSP 16/X6 I decided the text was too small. So, I went back to the template with layers and resized my image (before brush, text and borders) to height 700 px ("proportional" checked). I then moved the text and flower tube both towards the center. For the text I used size 72 and then I doubled the size of the borders (4 instead of 2, and 8 instead of 4). Here is the revised version made in PSP 16/X6 (Click on the tag to view the full-sized tag. Note the lightbox shows the image with a white border):

Back to 'My Tutorials Index'